6 Basic Rules for Fermenting Success
Fermentation is becoming an increasingly popular food trend due to its richness in probiotics and its multitude of health benefits such as improved digestion, immunity-boosting ability, and weight management. As a beginner, fermenting foods may seem like a time-consuming and challenging task; however, it is an easy process that you should try. Read below to learn tips that will make your fermenting projects a success.
Every day, more people are starting to realize the health benefits of fermented food. This preservation method uses microbes, such as bacteria and yeast, to create our favorite foods like yogurt, kombucha, and pickles. Fermented foods are a great source of probiotics, which are essential for a healthy digestive system.
Each one of us carries an estimated 100 trillion microorganisms in our gut, most of which are beneficial. Consuming probiotic-rich fermented foods and drinks, such as tempeh or kombucha, offers advantages, such as improved digestion, boosted immunity, and controlled weight.
Fermenting your own goodies gives you the freedom to explore various ingredient combinations and flavors. It’s easy to ferment at home using fresh ingredients, quality salt, and reCAP’s air-locks.
The Fermentation Rules
1. Use Quality Ingredients
The fresher the produce you choose to ferment, the better the finished product will turn out. For optimal results, use seasonal organic fruits and vegetables. You want the bacteria from the produce to get to work in the fermenting process without pesticides in the mix.

Also, researchers have found that organically-grown crops have more antioxidants than their conventionally-grown counterparts. Organic produce exerts more antioxidants, which protect the plant from disease and pests that are typically addressed with chemical pesticides with conventional growing methods. And antioxidants protect our cells from aging, so cheers (with kombucha) to proper digestion and glowing skin!
Water is also an ingredient that should be of good quality. Filtered water is preferred because it doesn’t contain the minerals found in spring water. Tap water works too; just be sure to boil it for 15 minutes and let cool to room temperature or let the water sit in an open container for 24 hours to let the chlorine evaporate.
2. Measure your Ingredients
Accurately Fermenting is an art and a science, meaning you can feel free to get creative with it, but you need to ensure you’re measuring accurately. A digital scale is ideal for making sure you're using the right amount of ingredients for a successful and tasty batch of fruits or veggies.
In this case, weight is more accurate than measuring by volume (teaspoons, cups, etc.). For example, salt comes in different crystal sizes, so the amount will vary based on the crystal size. Measuring by weight ensures consistency every time you make your favorite fermented goodie.
3. Use Salt that is Rich in Minerals
There is no room in the fermentation process for typical table salt because of anti-caking agents and additives. Mineral-rich salts are best because they are unrefined, making them better for fermenting by preserving the natural chemical composition.

Use a high-quality, mineral-rich salt, such as Himalayan Pink Salt. Check the label to make sure it is pure salt with no additives, such as iodine, which can inhibit the process.
Mineral-rich salts provide more food for hungry micro-bacteria to breakdown and provide a guard against bad bacteria. However, the presence of salt in your ferment will reduce the “crunch” of your veggies.
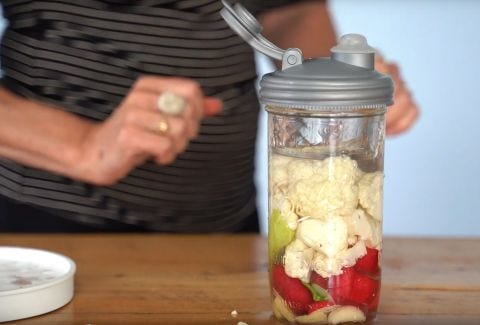
4. Keep Ingredients Submerged
The brine, a dissolved solution of salt and water, is helpful to ward off harmful bacteria. However, salt is not necessary. What’s more important is that you keep your ingredients fully submerged. Using less salt is helpful for those who have dietary restrictions but still love fermenting veggies.

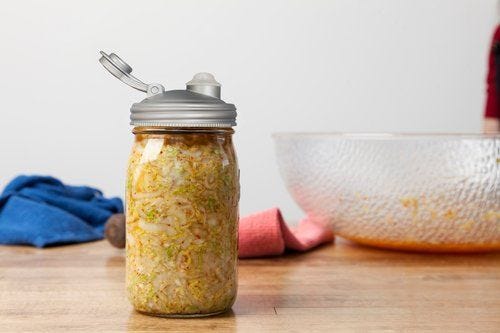
In general, there are two types of vegetable ferments, one for shredded vegetables and one for large vegetables. Shredded-vegetable brines use a 1.5 percent brine. For a large-vegetable ferment, we recommend using a 3 percent brine. If you have a scale at home, weighing your salt will increase accuracy.
Brine Calculation per Quart of Water
- 1.5% Brine: 1 (one) tablespoons of salt (27 grams)
- 3%Brine: 2 (two) tablespoons of salt ( 45 grams)
5. Use an Air-Tight Lid for Optimal Conditions
Not only do you need to keep your fermenting foods submerged in liquid, but you also need to keep them away from air exposure. The fermentation process requires anaerobic conditions, meaning an oxygen-free environment.
Yeasts and molds grow in the presence of oxygen and can ruin your fermenting concoction. Make sure your mixture is completely air-tight to prevent spoilage from happening. If you are unsure if your brew is spoiled, remember the phrase “when in doubt, throw it out” and start over.

6. Watch the Temperature
You want your ferment to be at an ideal temperature range between 65 and 72 degrees Fahrenheit. If it’s too cold the fermentation process will take too long, or not start at all. And, if it’s too warm, the fermentation process will happen too quickly. If your house is too hot or cold, put your ferment in a cooler or warm it up with a heat mat.
Also, keep your ferment out of direct sunlight to keep the temperature steady. By day two or three, you should notice tiny bubbles forming. After you see bubbles, start tasting daily, by taking a little bit out, and keep the rest covered in brine with the weight to prevent direct air exposure to the produce.
Once you are satisfied with the taste of your DIY adventure, remove the weight and store it in your fridge.
Get To It!
Home fermentation can be a fun family or date night activity. reCAP’s lids make it easy to take your old Mason jars and turn them into fermenting powerhouses. Also, be sure to check out these other recipes on fermentation: